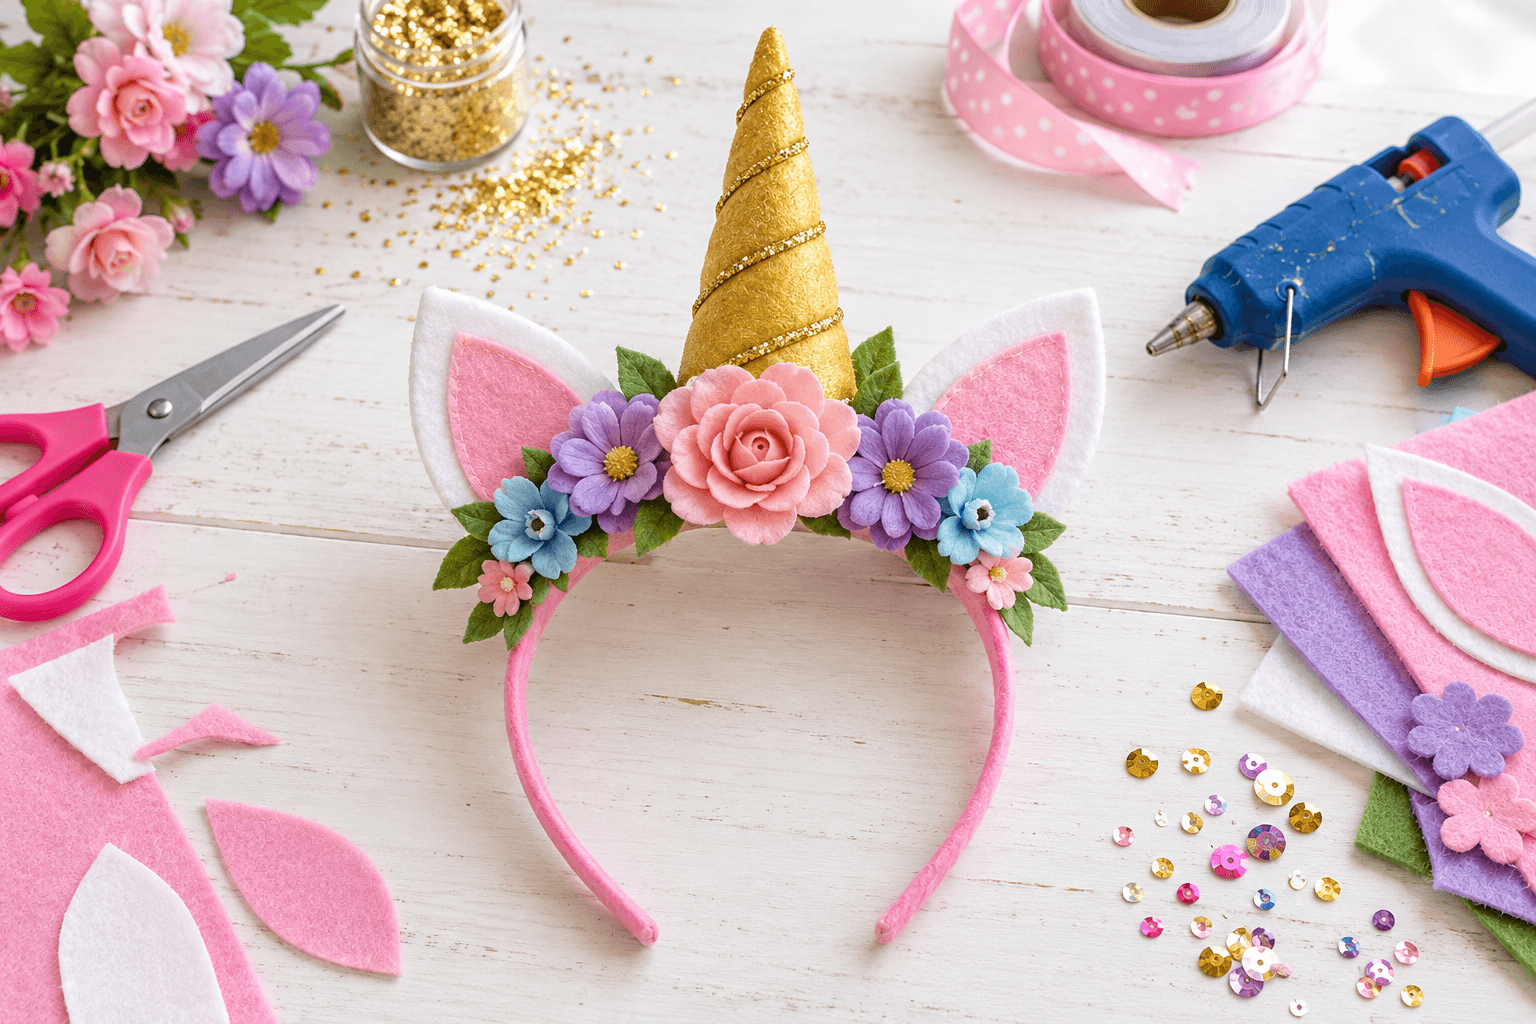
DIY Unicorn Headband: Easy Magical Party Craft
A DIY unicorn headband takes a plain headband, a few scraps of felt, and about 30 minutes. That’s all it takes to turn an ordinary afternoon into something magical.
Whether you’re planning a birthday party, a costume, or a rainy day with the kids, this is a craft that gets worn the second the glue dries. And once one child has a unicorn horn, every other child at the party will want one too. Be ready.
Let’s make some.
Why a DIY Unicorn Headband Is a Party Favorite
Unicorns never really go out of style, and a headband is the easiest way to wear one. Here’s why they work so well at parties:
They invite pretend play. Put one on and a kid becomes a magical creature. No instructions needed.
They work at any age. Kids love them, and adults wear them to bridal showers, Halloween parties, and baby showers.
They match any theme. Swap the colors, flowers, and glitter and the same headband fits a spring party, a winter party, or anything in between.
They do three jobs. Use them as party favors, photo booth props, or a craft activity during the party itself.
They get everyone involved. Making and wearing them together is the kind of thing guests remember.
What You Need for a DIY Unicorn Headband
None of this is hard to find. Check your craft drawer first.
A plain headband. A simple plastic or fabric covered one. Plastic is sturdy and easy to glue to. Fabric is more comfortable to wear.
Felt or foam sheets. For the horn and ears. Gold, white, and pink work beautifully. Felt is soft and easy to cut, and foam adds thickness.
Polyester stuffing or cotton. Fills the horn so it stands up. Scrap fabric or crumpled tissue paper works in a pinch.
A hot glue gun. It dries fast and holds well. Tacky craft glue or fabric glue also works, but it takes longer to dry.
Scissors and a pencil. For tracing and cutting your shapes.
Decorations. Faux flowers, glitter, ribbon, sequins, stickers, or pom poms.
Optional extras: wire or pipe cleaners for extra support, glitter glue or metallic paint for shimmer, mini LED lights for a glow, and tulle or fabric scraps for a mane.
A few tips before you start. Pick soft materials if little kids will wear it, and skip sharp pins or hard decorations. Mix felt and foam, since the combination makes sturdy but soft horns and ears. And if you don’t have a hot glue gun, plan for extra drying time.
How to Make a DIY Unicorn Headband in 5 Steps
Step 1: Make the horn. Cut a triangle from gold or glittery felt, about 6 inches tall. Roll it into a cone and glue the edge closed. Stuff it lightly with polyester stuffing or cotton so it stands up, then seal the base with glue.
Step 2: Attach the horn. Use a hot glue gun to fix the horn to the center of the headband. Hold it in place for a full minute so it stays put. (Grown ups handle the hot glue. It burns little fingers.)
Step 3: Make the ears. Cut two larger ear shapes from white felt and two smaller inner ear shapes from pink felt. Glue the pink pieces onto the white ones, then attach one ear on each side of the horn.
Step 4: Decorate. Add faux flowers, ribbon, glitter, or sequins around the horn and ears. This is where the headband gets its personality, so let your child lead.
Step 5: Let it dry, then wear it. Give the glue time to set completely before anyone puts it on. Then it’s ready to shine.
Make Your DIY Unicorn Headband One of a Kind
Once the basic headband is done, the fun really starts.
Add sparkle. Glitter glue or loose glitter on the horn and ears, or a coat of metallic paint for a shimmer.
Make a flower crown. Glue small silk or paper flowers along the headband and around the base of the horn. Mix colors and textures for a lush look.
Add a flowing mane. Attach ribbons or strips of tulle to the sides or back of the headband.
Light it up. Mini LED fairy lights give a glowing effect that’s perfect for evening parties.
Play with texture. Wrap the horn in colorful yarn or metallic thread, or use patterned felt.
Go seasonal. Tiny pumpkins for Halloween, snowflakes for winter, hearts for Valentine’s Day.
Add a name. Use fabric paint, stickers, or iron on patches to put a guest’s name or initials on each headband. Great for party favors.
Host a Unicorn Craft Party
A DIY unicorn headband is also the perfect party activity. Here’s how to make it work:
Prepare a kit for each guest. A headband, felt pieces, glue, stuffing, and decorations, all in one place.
Keep supplies organized. Trays or containers keep everything within reach and cut down on chaos.
Decorate the craft area. Unicorn balloons, banners, and table covers set the mood.
Set up a photo spot. Give guests a place to show off their finished headbands.
Play some music. Upbeat tunes keep the energy high.
Have adult helpers ready. Younger kids need help with hot glue.
Serve themed treats. Rainbow cupcakes and pastel drinks complete the picture.
Want more crafts for the same party? Our DIY princess crown is a quick paper craft that pairs well with unicorn headbands, and you can make a sparkly New Year’s headband using the same basic steps.
Wrapping Up
A DIY unicorn headband is more than a craft. It’s an easy, affordable way to spark creativity and make something kids actually want to wear. Whether you’re making one for a quiet afternoon or a dozen for a party, grab your glitter. Your unicorn moment awaits.
Quick Questions
Can I make these without hot glue? Yes. Tacky glue or fabric glue works too, but it takes longer to dry.
Are unicorn headbands safe for toddlers? With adult supervision and no small parts, yes. Stick to soft materials and avoid pins or sharp decorations.
How long does it take to make one? About 20 to 30 minutes, depending on how much decorating you do and how long the glue takes to dry.
Can I wash them? They aren’t machine washable. Spot clean with a damp cloth.
What if I don’t have felt? Foam sheets, craft paper, or fabric scraps work as alternatives.
More kid craft ideas: Red Ted Art: Easy Crafts for Kids